
Looking for ways to repair any leaking shower faucets? We have the perfect guide and solution for you. Continue reading to learn more.
A leaky shower or sink faucet requires replacement. Here’s a quick fix to stop a dripping faucet from making noise until you can make that expensive repair, along with a step-by-step tutorial to making it.
For the best faucet repair, contact Eco Pro Plumbing, the best plumbing service.
Choosing the Appropriate Replacement Faucet Cartridge
You should start by locating the appropriate replacement part for your leaking faucet. Before beginning the repair, knowing the model of your faucet can frequently help you find a replacement, but if you don’t have that knowledge, take the broken part with you to the store so you can match it up with a universal replacement part.
Leaky Faucet Repair: A Step-by-Step Guide
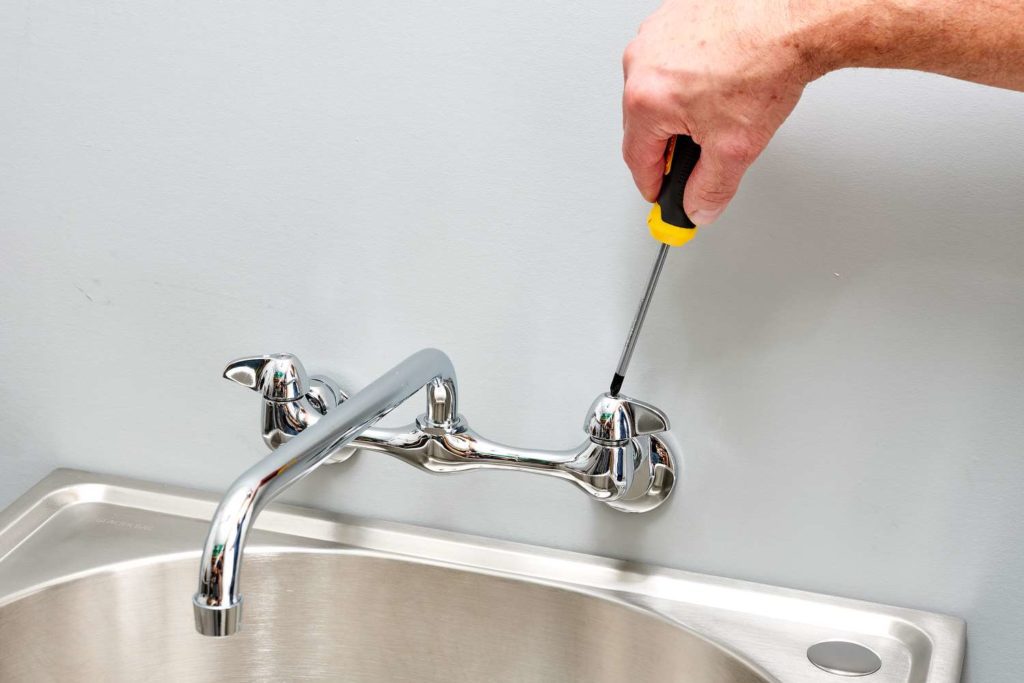
- Cut off the sink’s water supply. If there is no shutoff under the sink, find the main valve in the water line, and close it from there.
- The faucet handle cap should then be removed. Some may differ somewhat, but as you can see, it’s rather simple to find and get rid of.
- Lift the handle off the faucet after removing the screw, keeping it in place and removing the cap.
- Then, if you have a ring, take it off. You should be able to simply loosen the ring with a tool if it has a hex top. If not, wrap a piece of cloth around the ring before turning it to prevent scratching the surface.
- Remove the cartridge at the last. Your hand should be able to effortlessly wriggle it out.
- Put a new cartridge in. Before putting everything back together, make sure it is properly situated so that the handle can turn on and off. Otherwise, your handle might no longer turn in the direction you intended. Many of these cartridges are tricky in this regard yet easy to understand.
- Enjoy! Without that bothersome drip, you’ll sleep like a baby, and it only cost you a few dollars and a few minutes of your time.
Let’s talk about that shower now. With a few minor, possible modifications, it is slightly different but still quite easy.
Leaky Shower Faucet Repair: A Step-by-Step Guide
- Cut off the shower’s water supply. You might find this at a wall access panel behind the shower, or you might need to turn off the main line as in the example above.
- Remove the cap from the handle’s end.
- The handle’s mounting screw should be removed. If you have a beauty ring, take it off now to reveal the valve stem. Once more, be cautious with your finish and shield the item with a towel.
- Get rid of the valve stem. This stem ought to include a hex section where you may secure it with your pliers (channel locks).
- The old washer can be removed by unscrewing the screw securing the rubber washer to the end of the valve.
- Replace the old washer and fasten it with the screw you just removed.
- The threads that you will be screwing back into the fixture should be covered with Teflon tape.
- Reassemble the faucet using the same method you used to take it apart.
How to Reduce a Leaking Faucet’s Noise
If you’re not going to fix this right away, we do have a suggestion to at least stop the annoying noise. Connect the faucet’s drip to the base where the water collects by tying a string.
Now there won’t be a “blip” as the water flows silently to the basin down the string. The thread will start to “brown” from the water, which will also demonstrate how rusty the water is. For more information, visit Eco Pro Plumbing website. Get a free quotation for all of your home’s plumbing issues.